Pages

Thursday 18 September 2014

Paper Art - Gazebo

Today I have been searching the internet for designs on castles as my son has been set homework to learn about them and demonstrate a castle in a model form using any material !

In other words "Mum" has been set homework as my 12 year old is not that creative .

I found the perfect design and whilst searching a site I came across some fantastic 3d model designs including this gorgeous Gazebo. I don't know what I am going to use it for but I just had to try and make it, plus I thought it would be great practise before I piece together all the castle cuttings.
(That will follow on another page as I am determined my son is going to help put it all together).

So I have downloaded all the template and have started to cut out each section - I can't find any instructions for putting together so I will just have to figure it out as I go along .


Please excuse the quality of my pictures 


The folding of this next piece is rather fiddly due to being so thin 


After cutting all the details are ready to take out the way 


Resulting in this gorgeous piece-


Now for the fun part of glueing together.

I started with the side panels and put them together and then added a top and bottom to secure and strengthen a little - 


I then made the base and glued the part above to the base - ( I started using my glue gun in the end as it was quicker and easier then sticky tape and a glue stick ).


Now to stick all the roof parts together to complete .


We after getting glue every where and a few sticky moment , my gazebo is complete.


If you want to try one yourself , I found the template at 


http://monicascreativeroom.se/category/cutting-files/3d-models/


Sunday 14 September 2014

Easy Roll-Brim Hat

I haven't posted for a while so today I thought I would share a pattern I have for this snugly hat as Autumn is approaching.


Measurements - to fit average size adults head approx 50cm (55cm)

Figures in brackets are for the larger size.

Materials

1 x 50g of King Cole Merino blend Aran in each of 3 colours , (A) Denim, (B) aubergine & (C) Mustard.

Needles

Pair of 5mm (no 6) 

Tension -

18sts and 40 rows measure 10cm square using garter stitch on 5 mm needles.


Pattern

With 5mm needles and A cast on 91(100) sts.  Cont in g st , work 14 rows.

Cont in stripe pattern as follows - 4 rows B, 4 rows C, and 4 rows A.

Rep these 12 rows throughout .

Cont in pattern until hat measures 14(16)cm from the beg.

Shape Crown - continuing in pattern colours 

1st dec row  - k4, k2tog, *k7(8), k2tog, rep from * to last 4sts, k4 81(90)sts

Work 3 rows straight.

2nd dec row - k4, k2tog, *k6(7), k2tog, rep from * to last 3 sts, k3. 71(80)sts.

Work 3 rows straight.

3rd dec row - k4, k2tog, *k5(6), k2tog, rep from * to last 2 sts, k2. 61(70)sts.

Work 1 row straight.

4th dec row - k4, k2tog, * k4(5), k2tog, rep from * to last st, k1. 51(60)sts

Work 1 row straight 

5th dec row- k4, k2tog, *k3(4), k2tog, rep from * to end . 41(50)sts

Work 1 row straight 

6th dec row- k3, k2tog, *k2(3), k2tog, rep from * to end . 31(40)sts

Work 1 row straight.

7th dec row - * k2tog, rep from * to last 1(0)st, k1(0). 16(20)sts.

Work 1 row straight.

8th dec row - *k2tog, rep from * to end . 8(10) sts.

Cut of yarn , thread yarn through remaining sts and draw up and fasten off .


Making up - 

Join back seam.
Turn to right side and roll up brim.


Monday 21 April 2014

Male cards

I have a lot of male birthdays coming up so I thought I had best focus on getting some cards made up for them .

I seem to find there isn't lot of choice in the craft shops for making cards for men so here are a few that  i have made by printing my own images , cutting and making up.


My Lazy Gardener Bear 


For the man that loves the open road on his Motor Bike


The Beer Bear 


The Man that loves a Pint (or two)


And another for the man that likes a Beer


Thursday 10 April 2014

New box type card

Today I have been making a new box type 3d card. 

I absolutely love it . Here are some pictures showing the different angles of the card . 


Close up of the flowers on the arch


Close up of the bench and extra copies of the cushion and hat to make it stand out 


This next picture shows the inside of the 
Card which as you can see has a slightly different picture and view 


This card does fold flat for posting and when you take it out the envelope it practically pops into shape . 


Friday 7 March 2014

DIY gift box

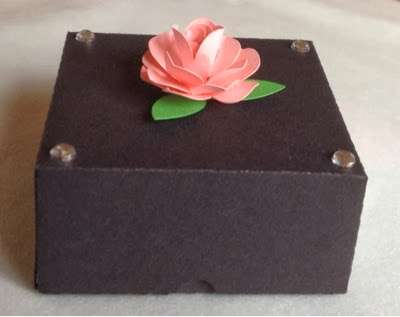
Today I decided to make use of my mini card/paper roses a make a gift box. 
This would be perfect for a Mother's Day gift of jewellery .

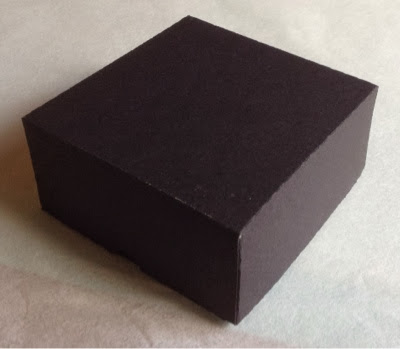
I used a template I had made to cut the box out of card on my cutter (sorry forgot to take pictures before I made the box up).


These are the two pieces (top on the right - bottom on the left) - it was a bit of a tight fit so next time I need to adjust my template and make the top slightly bigger. 


Next was to decorate so I got my hot glue gun back out and glued the items to the top. 


There is still room to add a small gift tag. 


Friday 28 February 2014

Get well card

Well unfortunately my mum is in hospital poorly so it's not really been a good week to get some crafts done. 

I will be going in to visit her again this evening so I thought what would make her smile is a card made by me. :) 

She loves her garden and she normally can't wait until spring so she can plant all her flowers and seeds so I decided to make her a lovely flower card. 

I cut the flowers in 3 layers (in 3 different sizes) so I could pull the top layers upwards so they would look like 3D and the glued a lovely rhinestone gem in the centre . 


Friday 14 February 2014

Creating cards

The weather here in th UK is just simply awful !!
To cheer myself up and on the plus side - staying in the warm and dry - I have been busy with my new software and paper cutter designing new cards. 


There are more to come so will post some pictures soon x 


Thursday 6 February 2014

Magic Lampshade

I have seen a few pictures now of magic lampshades (don't think there actually called that but that's the name I'm using ha ha).
So today I decided to make my own. 

I cut out a beautiful butterfly for some card toppers last night so I decided to see what they would look like on my lampshade . 

Here's my lamp in my living room , as you can see it's turned off and the lampshade is plain 


Now after fiddling about with my very delicate butterfly , I attached it to the inside of the lampshade and voila when the lamp gets turned on this is what it looked like 


I think it's gorgeous as you really can't see them when the lamp is off .


Here are a few more that I have done using other cut outs I have made 


Hope you all like xxx


Saturday 1 February 2014

Decorating Candles


Today i am posting some pictures of some candles i have decorated for gifts using Water based ink jet transfer paper.

I made these quite a few months ago and also some at christmas for gifts (before i started the blog so i have no pictures for a detailed tuturiol).

Basically these sheets of transfer paper are available at most craft stores.

I designed the pictures i wanted and also took some photo's which i had on my computer and printed them out onto the transfer sheet ( print on good quality photo setting).
Allow the ink to dry and then spray with some clear acrylic sealer.
Again wait for the sealer to dry.
Cut your image out, place in tepid water until the image comes away from the backing paper and apply to the candle. Rub it on carefully to remove any air bubbles and excess water (they can be quite fragile so rub gently).


Friday 24 January 2014

I-pad stand made on scroll saw

I use my ipad for just about everything , reading books , accounts , as a receipe book when baking etc etc . I was looking for a stand which would be practical especially when baking so it wasn't just sitting on my work top along with the flour and the rest of the mess I tend to make. 

All the ones I came across were plastic and quite ugly in my opinion as I also wanted something that looked good sitting on the work unit when the I-pad wasn't on it.  

I happened to stumble across a pattern for a wooden I-pod stand which looked pretty easy to make so I decided to adapt it to make a bigger version so the I-pad fitted nicely on it. 

Luckily I had some lovely pine sheets of wood left from a previous project so I decided I would use that and then when it is all finished I would stain it and varnish. 

It wasn't quite as easy as it looked and the detail I chose to scroll out in the centre took hours ! (I have a pinned blade scroll saw so anyone that knows what that is will know I had to keep taking the blade out and then tighten back up for each section that is cut out ).

I am very pleased with the end result after all the time it took and is perfect for my kitchen , I have had quite a few compliments on it too when family & friends have seen it sitting proudly on the work top (some don't believe I actually made it either because of the detail so I will take that as a compliment too :)   )

FRONT VIEW


SIDE & BACK VIEW


HOLDING My I-PAD 

My ipad on the holder with my favorite internet page (Pinterest of course) .

Sorry the pictures aren't fantastic but my camera on my phone is having a weird morning and keeps playing up ! 


Wednesday 8 January 2014

Coffee stain art

This is something I tried last year.

The picture is of my boxer dog - she is such a character and even though she looks "moody" she is always bouncy and full of fun.

First thing is to make a black coffee , the stronger the coffee the darker the colour you can add more coffee granules later if it isn't dark enough. Let it cool down until cold. 

I took a photo I had and drew the outline and features I wanted onto the plywood with a pencil. 
With my pyrography pen I went around the outline again and burnt it onto the wood. 
After this is done paint in the details you want stained with a paintbrush and your coffee. Start with the lighter areas and allow to dry. For the darker sections I either re-painted or made the coffee stronger 

And this was the result 


The strip across her eyes is to with my camera not the actual picture. 

Making a late New Years resolution

There just just doesn't seem to be enough hours in the day & I think I really need to organise myself .
I have so many ideas and projects on the go at the moment from knitting a jumper & a hat , to making a cushion from up-cycled old clothes, to canvas art work , etc etc and none of them are actually getting finished. 
Around that I'm a busy mum doing the normal boring household chores , school runs and fitting in work Inbetween. 
My worse addiction at the present time is "pininterest" - aaahhh soooo many ideas and fantastic creative people out there that I just can't tear myself away and then I spot the tutorials and my brain goes into overdrive ! 
So my plan for the day is to organise my self a schdule , that's after I finish at work and then do the household stuff etc etc xx
Have a good day everyone 

Tuesday 7 January 2014

Knit a lovely chunky scarf

Here is a chunky scarf I recently knitted.
You can sew the ends to make a cowl and also cast on as many stitches as you like but I did 24 for myself.

What you need :

10mm uk needles
Bulky / chunky yarn 200g (I didn't use the whole ball and just knitted to the length I wanted) 

Pattern :

cast on 24sts 
Row 1 ) "K1 , yrn over, P1 yrn over "  continue this across until end of row
Row 2). K the knit sts and P the purl sts but drop all the yrn overs across the row .

Continue these rows to the length you want and cast off. For a cowl sew the cast on edges together.

Or for another alternative pattern you could :

Cast on 24sts
Row 1 ) " K1 , yrn over , K1 yrn over" - repeat across sts
Row 2). "P1, drop yrn over , P1, drop yrn over" - repeat across sts 


Hi everyone

My first post to my blog is just to say hi really.
I will hopefully get around to sorting some photos and tutorials on some of the items I have made and also refer to other bloggers out there as some ideas have come from there sites that I have stumbled across.
It's a miserable day here in the UK so after the normal housework and clearing up after the kids (&husband ha ha) has been done I am hopefully going to finish the cushion I have been working on made from up-cycled outgrown clothes.